|
|
马上注册,结交更多好友,享用更多功能^_^
您需要 登录 才可以下载或查看,没有账号?立即注册
x
如果只要求手机屏幕上一部分改变,用新建activity的方法就不行了,这时就要使用fragment。新建一个项目然后再MainActivity.kt文件旁新建2个fragment,方法是,鼠标右键点目录->new->Fragment->Fragment(Blank),系统会自动生成xml文件跟kt文件,修改BlankFragment.kt文件:
- package com.example.xinwei.fragmentkotlin
- import android.app.Fragment
- import android.os.Bundle
- import android.view.LayoutInflater
- import android.view.View
- import android.view.ViewGroup
- class BlankFragment : Fragment() {
- override fun onCreateView(inflater: LayoutInflater, container: ViewGroup?,
- savedInstanceState: Bundle?): View? {
- return inflater.inflate(R.layout.fragment_blank, container, false)
- }
- }
修改BlankFragment2.kt文件:
- package com.example.xinwei.fragmentkotlin
- import android.app.Fragment
- import android.os.Bundle
- import android.view.LayoutInflater
- import android.view.View
- import android.view.ViewGroup
- class BlankFragment2 : Fragment() {
- override fun onCreateView(inflater: LayoutInflater, container: ViewGroup?,
- savedInstanceState: Bundle?): View? {
- return inflater.inflate(R.layout.fragment_blank_fragment2, container, false)
- }
- }
修改fragment_blank.xml
- <FrameLayout xmlns:android="http://schemas.android.com/apk/res/android"
- xmlns:tools="http://schemas.android.com/tools"
- android:layout_width="match_parent"
- android:layout_height="match_parent"
- tools:context="com.example.xinwei.fragmentkotlin.BlankFragment">
- <!-- TODO: Update blank fragment layout -->
- <TextView
- android:layout_width="match_parent"
- android:layout_height="match_parent"
- android:background="#ffff00"
- android:text="@string/hello_blank_fragment" />
- </FrameLayout>
修改fragment_blank_fragment2.xml
- <FrameLayout xmlns:android="http://schemas.android.com/apk/res/android"
- xmlns:tools="http://schemas.android.com/tools"
- android:layout_width="match_parent"
- android:layout_height="match_parent"
- tools:context="com.example.xinwei.fragmentkotlin.BlankFragment2">
- <!-- TODO: Update blank fragment layout -->
- <TextView
- android:layout_width="match_parent"
- android:layout_height="match_parent"
- android:background="#ff0000"
- android:text="@string/hello_blank_fragment" />
- </FrameLayout>
修改activity_main.xml文件
- <?xml version="1.0" encoding="utf-8"?>
- <LinearLayout xmlns:android="http://schemas.android.com/apk/res/android"
- xmlns:app="http://schemas.android.com/apk/res-auto"
- xmlns:tools="http://schemas.android.com/tools"
- android:layout_width="match_parent"
- android:layout_height="match_parent"
- android:orientation="vertical">
- <LinearLayout
- android:id="@+id/idlayout1"
- android:layout_width="match_parent"
- android:layout_height="0dp"
- android:layout_weight="8"
- android:orientation="vertical"/>
- <LinearLayout
- android:layout_width="match_parent"
- android:layout_height="0dp"
- android:layout_weight="1"
- android:orientation="horizontal">
- <Button
- android:id="@+id/idbutton1"
- android:layout_width="0dp"
- android:layout_height="wrap_content"
- android:layout_weight="1"
- android:text="button1" />
- <Button
- android:id="@+id/idbutton2"
- android:layout_width="0dp"
- android:layout_height="wrap_content"
- android:layout_weight="1"
- android:text="button2" />
- </LinearLayout>
- </LinearLayout>
修改MainActivity.kt
- package com.example.xinwei.fragmentkotlin
- import android.app.FragmentTransaction
- import android.support.v7.app.AppCompatActivity
- import android.os.Bundle
- import android.view.View
- import kotlinx.android.synthetic.main.activity_main.*
- class MainActivity : AppCompatActivity(),View.OnClickListener {
- override fun onClick(p0: View?) {
- when(p0?.id){
- idbutton1.id->{
- var manager=fragmentManager
- var transaction=manager.beginTransaction()
- transaction?.replace(R.id.idlayout1,BlankFragment())
- transaction?.commit()
- }
- idbutton2.id->{
- var manager=fragmentManager
- var transaction=manager.beginTransaction()
- transaction?.replace(R.id.idlayout1,BlankFragment2())
- transaction?.commit()
- }
- }
- }
- override fun onCreate(savedInstanceState: Bundle?) {
- super.onCreate(savedInstanceState)
- setContentView(R.layout.activity_main)
- idbutton1.setOnClickListener(this)
- idbutton2.setOnClickListener(this)
- var manager=fragmentManager
- var transaction=manager.beginTransaction()
- transaction?.replace(R.id.idlayout1,BlankFragment())
- transaction?.commit()
- }
- }
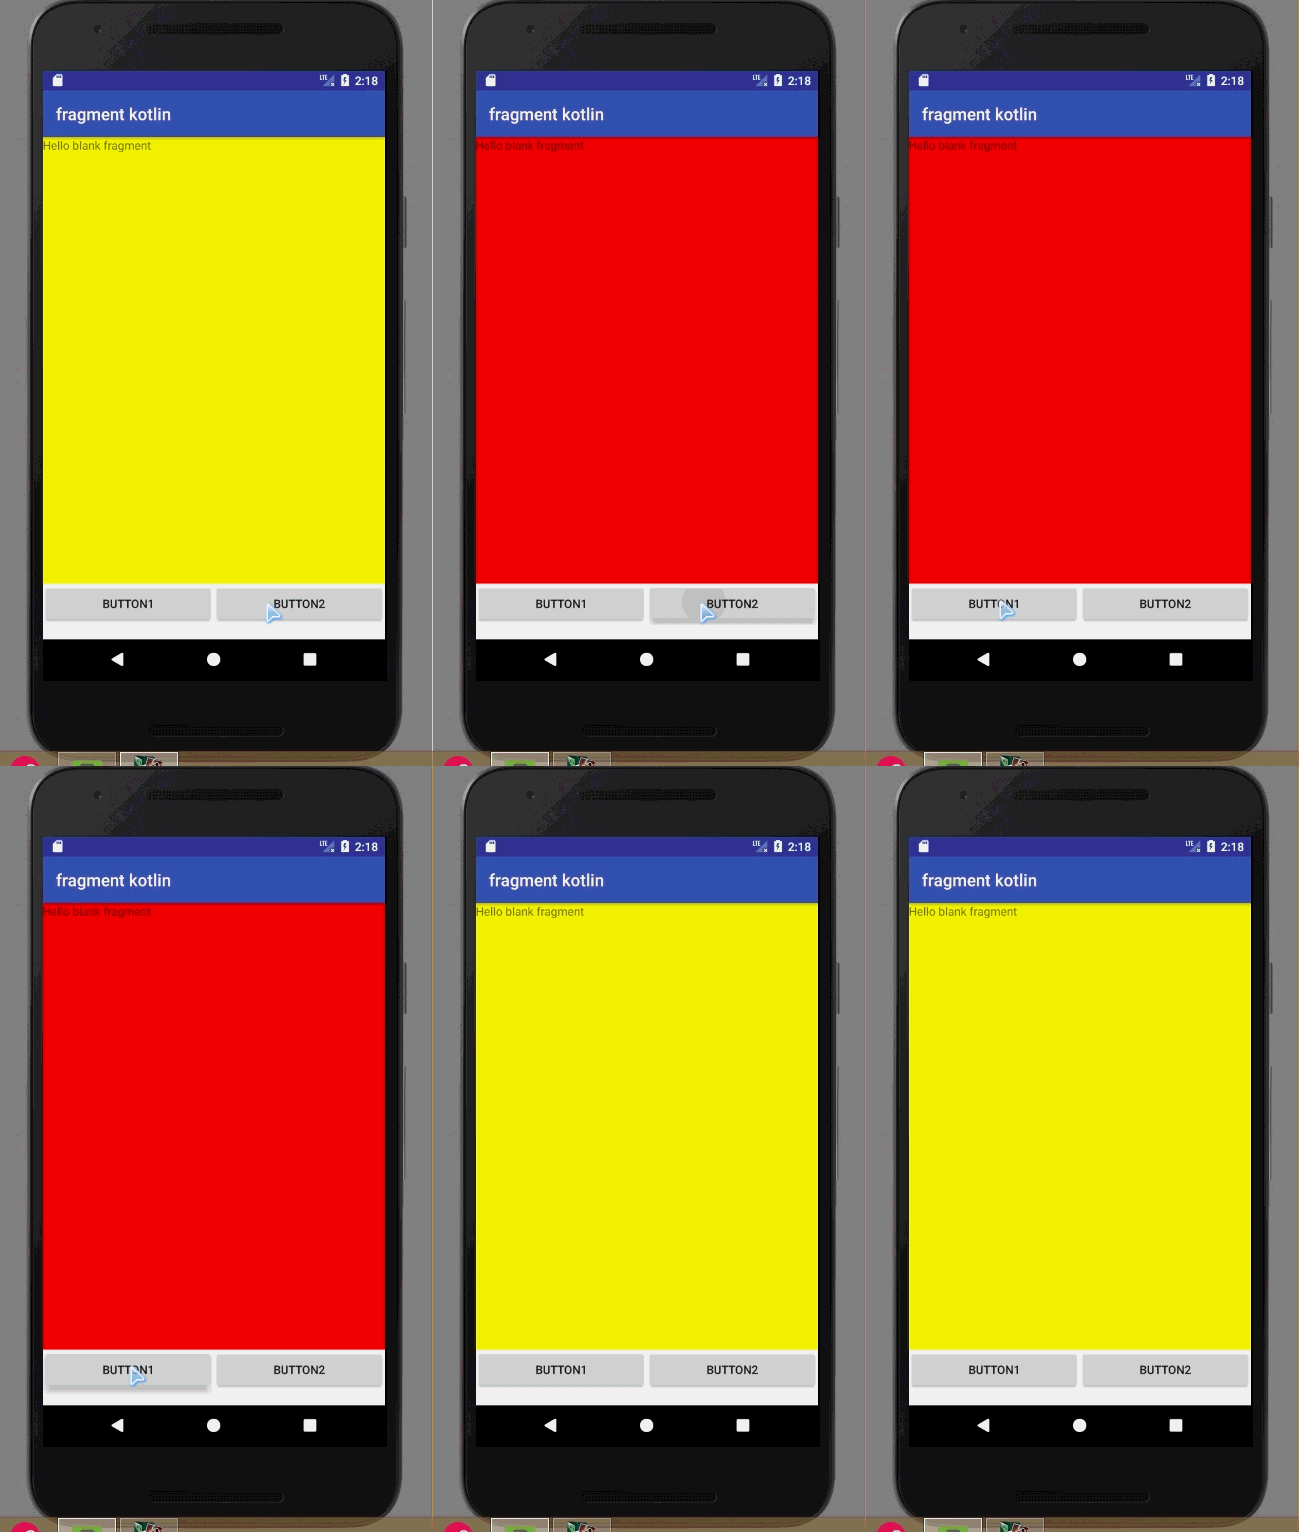
效果图为:

|
|
 ( 粤ICP备18085999号-1 | 粤公网安备 44051102000585号)