|
|
10鱼币
本帖最后由 tengke 于 2023-6-7 18:05 编辑
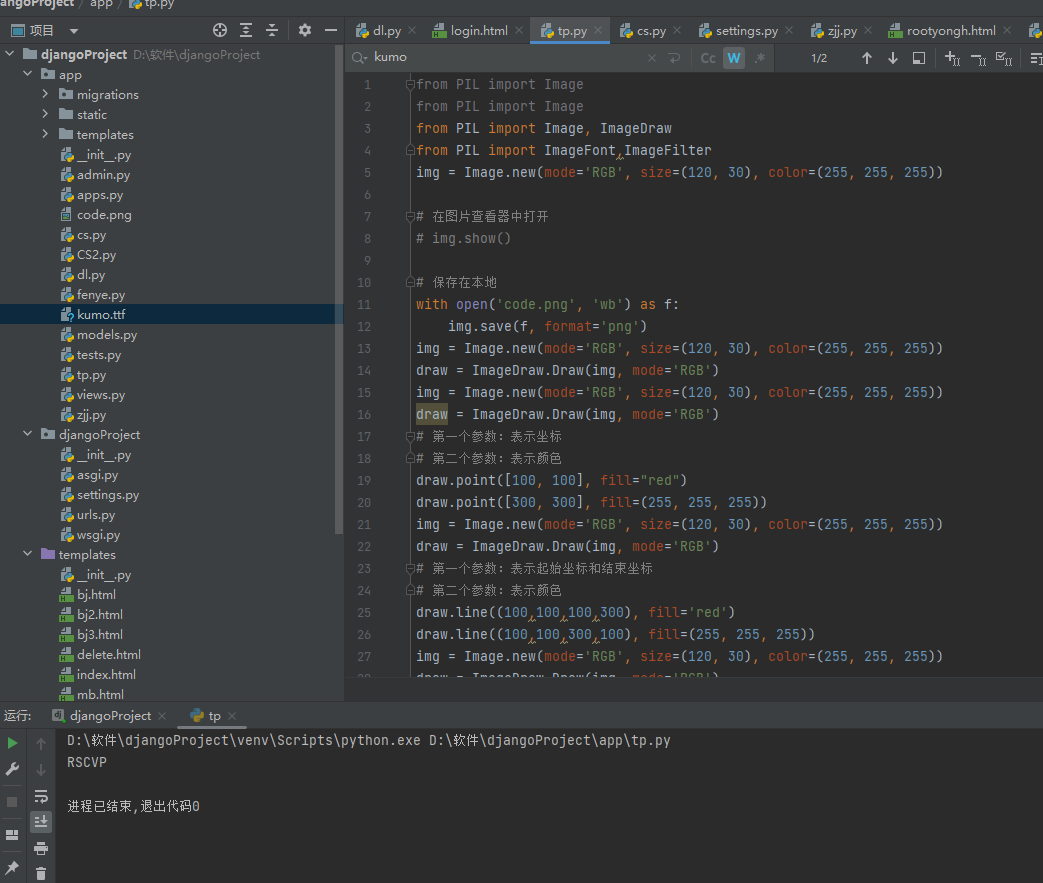
导入的模块内容
from PIL import Image
from PIL import Image
from PIL import Image, ImageDraw
from PIL import ImageFont,ImageFilter
img = Image.new(mode='RGB', size=(120, 30), color=(255, 255, 255))
# 在图片查看器中打开
# img.show()
# 保存在本地
with open('code.png', 'wb') as f:
img.save(f, format='png')
img = Image.new(mode='RGB', size=(120, 30), color=(255, 255, 255))
draw = ImageDraw.Draw(img, mode='RGB')
img = Image.new(mode='RGB', size=(120, 30), color=(255, 255, 255))
draw = ImageDraw.Draw(img, mode='RGB')
# 第一个参数:表示坐标
# 第二个参数:表示颜色
draw.point([100, 100], fill="red")
draw.point([300, 300], fill=(255, 255, 255))
img = Image.new(mode='RGB', size=(120, 30), color=(255, 255, 255))
draw = ImageDraw.Draw(img, mode='RGB')
# 第一个参数:表示起始坐标和结束坐标
# 第二个参数:表示颜色
draw.line((100,100,100,300), fill='red')
draw.line((100,100,300,100), fill=(255, 255, 255))
img = Image.new(mode='RGB', size=(120, 30), color=(255, 255, 255))
draw = ImageDraw.Draw(img, mode='RGB')
# 第一个参数:表示起始坐标和结束坐标(圆要画在其中间)
# 第二个参数:表示开始角度
# 第三个参数:表示结束角度
# 第四个参数:表示颜色
draw.arc((100,100,300,300),0,90,fill="red")
img = Image.new(mode='RGB', size=(120, 30), color=(255, 255, 255))
draw = ImageDraw.Draw(img, mode='RGB')
# 第一个参数:表示起始坐标
# 第二个参数:表示写入内容
# 第三个参数:表示颜色
draw.text([0,0],'python',"red")
img = Image.new(mode='RGB', size=(120, 30), color=(255, 255, 255))
draw = ImageDraw.Draw(img, mode='RGB')
# 第一个参数:表示字体文件路径
# 第二个参数:表示字体大小
font = ImageFont.truetype("kumo.ttf", 28)
# 第一个参数:表示起始坐标
# 第二个参数:表示写入内容
# 第三个参数:表示颜色
# 第四个参数:表示颜色
draw.text([0, 0], 'python', "red", font=font)
import random
def check_code(width=120, height=30, char_length=5, font_file='kumo.ttf', font_size=28):
code = []
img = Image.new(mode='RGB', size=(width, height), color=(255, 255, 255))
draw = ImageDraw.Draw(img, mode='RGB')
def rndChar():
"""
生成随机字母
:return:
"""
return chr(random.randint(65, 90))
def rndColor():
"""
生成随机颜色
:return:
"""
return (random.randint(0, 255), random.randint(10, 255), random.randint(64, 255))
# 写文字
font = ImageFont.truetype(font_file, font_size)
for i in range(char_length):
char = rndChar()
code.append(char)
h = random.randint(0, 4)
draw.text([i * width / char_length, h], char, font=font, fill=rndColor())
# 写干扰点
# for i in range(40):
# draw.point([random.randint(0, width), random.randint(0, height)], fill=rndColor())
#
# # 写干扰圆圈
# for i in range(40):
# draw.point([random.randint(0, width), random.randint(0, height)], fill=rndColor())
# x = random.randint(0, width)
# y = random.randint(0, height)
# draw.arc((x, y, x + 4, y + 4), 0, 90, fill=rndColor())
# 画干扰线
# for i in range(5):
# x1 = random.randint(0, width)
# y1 = random.randint(0, height)
# x2 = random.randint(0, width)
# y2 = random.randint(0, height)
#
# draw.line((x1, y1, x2, y2), fill=rndColor())
img = img.filter(ImageFilter.EDGE_ENHANCE_MORE)
return img, ''.join(code)
if __name__ == '__main__':
# 1. 直接打开
img,code = check_code()
print(code)
# img.show()
# 2. 写入文件
img,code = check_code()
with open('static\images\code.png','wb') as f:
img.save(f,format='png')
# 3. 写入内存(Python3)
# from io import BytesIO
# stream = BytesIO()
# img.save(stream, 'png')
# stream.getvalue()
# 4. 写入内存(Python2)
# import StringIO
# stream = StringIO.StringIO()
# img.save(stream, 'png')
# stream.getvalue()
pass
——————————————————————————————————————————————————————————————————
from app.tp import check_code
from io import BytesIO
def yzm(request):
if __name__ == '__main__':
# 1. 直接打开
img, code = check_code()
print(code)
报错内容##########麻烦那个大佬看看这个吧 愁死了
File "D:\软件\djangoProject\djangoProject\urls.py", line 24, in <module>
from app import dl
File "D:\软件\djangoProject\app\dl.py", line 49, in <module>
from app.tp import check_code
File "D:\软件\djangoProject\app\tp.py", line 44, in <module>
font = ImageFont.truetype("kumo.ttf", 28)
File "D:\软件\djangoProject\venv\lib\site-packages\PIL\ImageFont.py", line 996, in truetype
return freetype(font)
File "D:\软件\djangoProject\venv\lib\site-packages\PIL\ImageFont.py", line 993, in freetype
return FreeTypeFont(font, size, index, encoding, layout_engine)
File "D:\软件\djangoProject\venv\lib\site-packages\PIL\ImageFont.py", line 249, in __init__
font, size, index, encoding, layout_engine=layout_engine
OSError: cannot open resource
————————————
图片1

本帖最后由 isdkz 于 2023-6-7 18:28 编辑
这是路径问题,因为所有相对路径都是相对于工作目录的,你直接用 'kumo.ttf' 这个路径是在当前运行文件所在的路径找不到的,
所以就不能用相对路径了,你要用绝对路径,而要获取被导入文件的路径可以用 os.path.dirname(__file__)
所以字体文件的路径应该改成 os.path.join(os.path.dirname(__file__), 'kumo.ttf')
修改后的 tp.py 完整代码如下:
import os
from PIL import Image
from PIL import Image
from PIL import Image, ImageDraw
from PIL import ImageFont,ImageFilter
img = Image.new(mode='RGB', size=(120, 30), color=(255, 255, 255))
# 在图片查看器中打开
# img.show()
# 保存在本地
with open('code.png', 'wb') as f:
img.save(f, format='png')
img = Image.new(mode='RGB', size=(120, 30), color=(255, 255, 255))
draw = ImageDraw.Draw(img, mode='RGB')
img = Image.new(mode='RGB', size=(120, 30), color=(255, 255, 255))
draw = ImageDraw.Draw(img, mode='RGB')
# 第一个参数:表示坐标
# 第二个参数:表示颜色
draw.point([100, 100], fill="red")
draw.point([300, 300], fill=(255, 255, 255))
img = Image.new(mode='RGB', size=(120, 30), color=(255, 255, 255))
draw = ImageDraw.Draw(img, mode='RGB')
# 第一个参数:表示起始坐标和结束坐标
# 第二个参数:表示颜色
draw.line((100,100,100,300), fill='red')
draw.line((100,100,300,100), fill=(255, 255, 255))
img = Image.new(mode='RGB', size=(120, 30), color=(255, 255, 255))
draw = ImageDraw.Draw(img, mode='RGB')
# 第一个参数:表示起始坐标和结束坐标(圆要画在其中间)
# 第二个参数:表示开始角度
# 第三个参数:表示结束角度
# 第四个参数:表示颜色
draw.arc((100,100,300,300),0,90,fill="red")
img = Image.new(mode='RGB', size=(120, 30), color=(255, 255, 255))
draw = ImageDraw.Draw(img, mode='RGB')
# 第一个参数:表示起始坐标
# 第二个参数:表示写入内容
# 第三个参数:表示颜色
draw.text([0,0],'python',"red")
img = Image.new(mode='RGB', size=(120, 30), color=(255, 255, 255))
draw = ImageDraw.Draw(img, mode='RGB')
# 第一个参数:表示字体文件路径
# 第二个参数:表示字体大小
font = ImageFont.truetype(os.path.join(os.path.dirname(__file__), 'kumo.ttf')
, 28)
# 第一个参数:表示起始坐标
# 第二个参数:表示写入内容
# 第三个参数:表示颜色
# 第四个参数:表示颜色
draw.text([0, 0], 'python', "red", font=font)
import random
def check_code(width=120, height=30, char_length=5, font_file='kumo.ttf', font_size=28):
code = []
img = Image.new(mode='RGB', size=(width, height), color=(255, 255, 255))
draw = ImageDraw.Draw(img, mode='RGB')
def rndChar():
"""
生成随机字母
:return:
"""
return chr(random.randint(65, 90))
def rndColor():
"""
生成随机颜色
:return:
"""
return (random.randint(0, 255), random.randint(10, 255), random.randint(64, 255))
# 写文字
font = ImageFont.truetype(font_file, font_size)
for i in range(char_length):
char = rndChar()
code.append(char)
h = random.randint(0, 4)
draw.text([i * width / char_length, h], char, font=font, fill=rndColor())
# 写干扰点
# for i in range(40):
# draw.point([random.randint(0, width), random.randint(0, height)], fill=rndColor())
#
# # 写干扰圆圈
# for i in range(40):
# draw.point([random.randint(0, width), random.randint(0, height)], fill=rndColor())
# x = random.randint(0, width)
# y = random.randint(0, height)
# draw.arc((x, y, x + 4, y + 4), 0, 90, fill=rndColor())
# 画干扰线
# for i in range(5):
# x1 = random.randint(0, width)
# y1 = random.randint(0, height)
# x2 = random.randint(0, width)
# y2 = random.randint(0, height)
#
# draw.line((x1, y1, x2, y2), fill=rndColor())
img = img.filter(ImageFilter.EDGE_ENHANCE_MORE)
return img, ''.join(code)
if __name__ == '__main__':
# 1. 直接打开
img,code = check_code()
print(code)
# img.show()
# 2. 写入文件
img,code = check_code()
with open('static\images\code.png','wb') as f:
img.save(f,format='png')
# 3. 写入内存(Python3)
# from io import BytesIO
# stream = BytesIO()
# img.save(stream, 'png')
# stream.getvalue()
# 4. 写入内存(Python2)
# import StringIO
# stream = StringIO.StringIO()
# img.save(stream, 'png')
# stream.getvalue()
pass
|
最佳答案
查看完整内容
这是路径问题,因为所有相对路径都是相对于工作目录的,你直接用 'kumo.ttf' 这个路径是在当前运行文件所在的路径找不到的,
所以就不能用相对路径了,你要用绝对路径,而要获取被导入文件的路径可以用 os.path.dirname(__file__)
所以字体文件的路径应该改成 os.path.join(os.path.dirname(__file__), 'kumo.ttf')
修改后的 tp.py 完整代码如下:
import os
from PIL import Image
from PIL import Image
from P ...
|
 ( 粤ICP备18085999号-1 | 粤公网安备 44051102000585号)