|
|
马上注册,结交更多好友,享用更多功能^_^
您需要 登录 才可以下载或查看,没有账号?立即注册
x
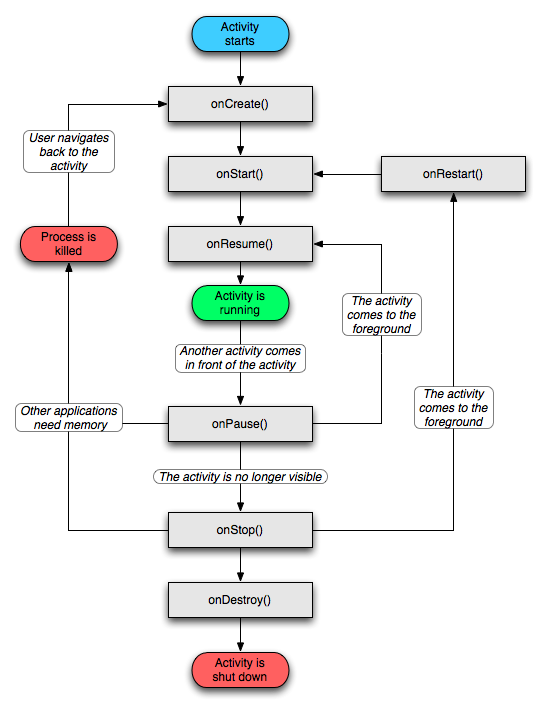
活动生命周期其实就是程序执行的各种过程,程序刚执行的时候叫oncreate,结束叫ondestroy。在这些函数里由我们来写代码初始化或者释放变量空间。以下为示意图:

首先在菜单里点close project把原来的项目关闭,我们再新建一个empty activity的项目,然后把activity_main.xml修改为:
- <?xml version="1.0" encoding="utf-8"?>
- <LinearLayout xmlns:android="http://schemas.android.com/apk/res/android"
- xmlns:app="http://schemas.android.com/apk/res-auto"
- android:orientation="vertical"
- xmlns:tools="http://schemas.android.com/tools"
- android:layout_width="match_parent"
- android:layout_height="match_parent"
- tools:context="com.example.xinwei.lifecycle.MainActivity">
- <Button
- android:id="@+id/button_1"
- android:layout_width="match_parent"
- android:layout_height="wrap_content"
- android:text="button1" />
- <Button
- android:id="@+id/button_2"
- android:layout_width="match_parent"
- android:layout_height="wrap_content"
- android:text="button2" />
- </LinearLayout>
然后在mainactivity.java旁边新建两个activity文件,一个叫NormalActivity.java,一个叫DialogActivity.java两个empty activity,把两个layout文件分别命名为normal_layout和dialog_layout,然后把androidmanifest.xml文件修改为以下代码- <?xml version="1.0" encoding="utf-8"?>
- <manifest xmlns:android="http://schemas.android.com/apk/res/android"
- package="com.example.xinwei.lifecycle">
- <application
- android:allowBackup="true"
- android:icon="@mipmap/ic_launcher"
- android:label="@string/app_name"
- android:roundIcon="@mipmap/ic_launcher_round"
- android:supportsRtl="true"
- android:theme="@style/AppTheme">
- <activity android:name=".MainActivity">
- <intent-filter>
- <action android:name="android.intent.action.MAIN" />
- <category android:name="android.intent.category.LAUNCHER" />
- </intent-filter>
- </activity>
- <activity android:name=".NormalActivity" />
- <activity
- android:name=".DialogActivity"
- android:theme="@style/Theme.AppCompat.Dialog" />
- </application>
- </manifest>
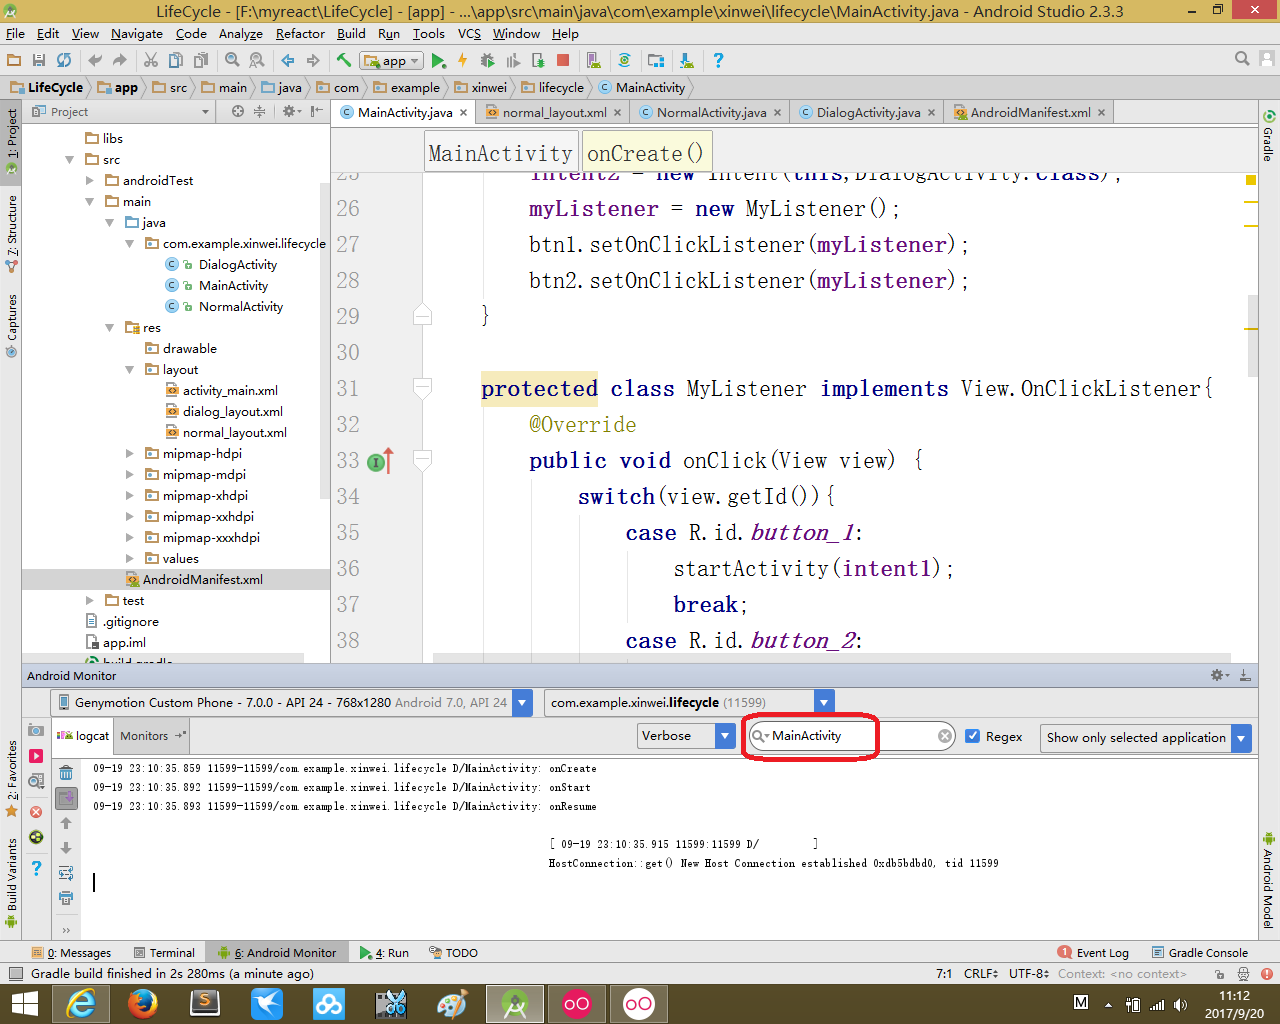
然后把mainactivity.java文件修改为:- package com.example.xinwei.lifecycle;
- import android.content.DialogInterface;
- import android.content.Intent;
- import android.support.v7.app.AppCompatActivity;
- import android.os.Bundle;
- import android.util.Log;
- import android.view.View;
- import android.widget.Button;
- import android.widget.Toast;
- public class MainActivity extends AppCompatActivity {
- private static String TAG="MainActivity";
- private MyListener myListener;
- private Intent intent1;
- private Intent intent2;
- @Override
- protected void onCreate(Bundle savedInstanceState) {
- super.onCreate(savedInstanceState);
- Log.d(TAG,"onCreate");
- setContentView(R.layout.activity_main);
- Button btn1 = (Button)findViewById(R.id.button_1);
- Button btn2 = (Button)findViewById(R.id.button_2);
- intent1 = new Intent(this,NormalActivity.class);
- intent2 = new Intent(this,DialogActivity.class);
- myListener = new MyListener();
- btn1.setOnClickListener(myListener);
- btn2.setOnClickListener(myListener);
- }
- protected class MyListener implements View.OnClickListener{
- @Override
- public void onClick(View view) {
- switch(view.getId()){
- case R.id.button_1:
- startActivity(intent1);
- break;
- case R.id.button_2:
- startActivity(intent2);
- }
- }
- }
- @Override
- protected void onStart() {
- super.onStart();
- Log.d(TAG,"onStart");
- }
- @Override
- protected void onResume() {
- super.onResume();
- Log.d(TAG,"onResume");
- }
- @Override
- protected void onPause() {
- super.onPause();
- Log.d(TAG,"onPause");
- }
- @Override
- protected void onStop() {
- super.onStop();
- Log.d(TAG,"onStop");
- }
- @Override
- protected void onDestroy() {
- super.onDestroy();
- Log.d(TAG,"onDestroy");
- }
- @Override
- protected void onRestart() {
- super.onRestart();
- Log.d(TAG,"onRestart");
- }
- }

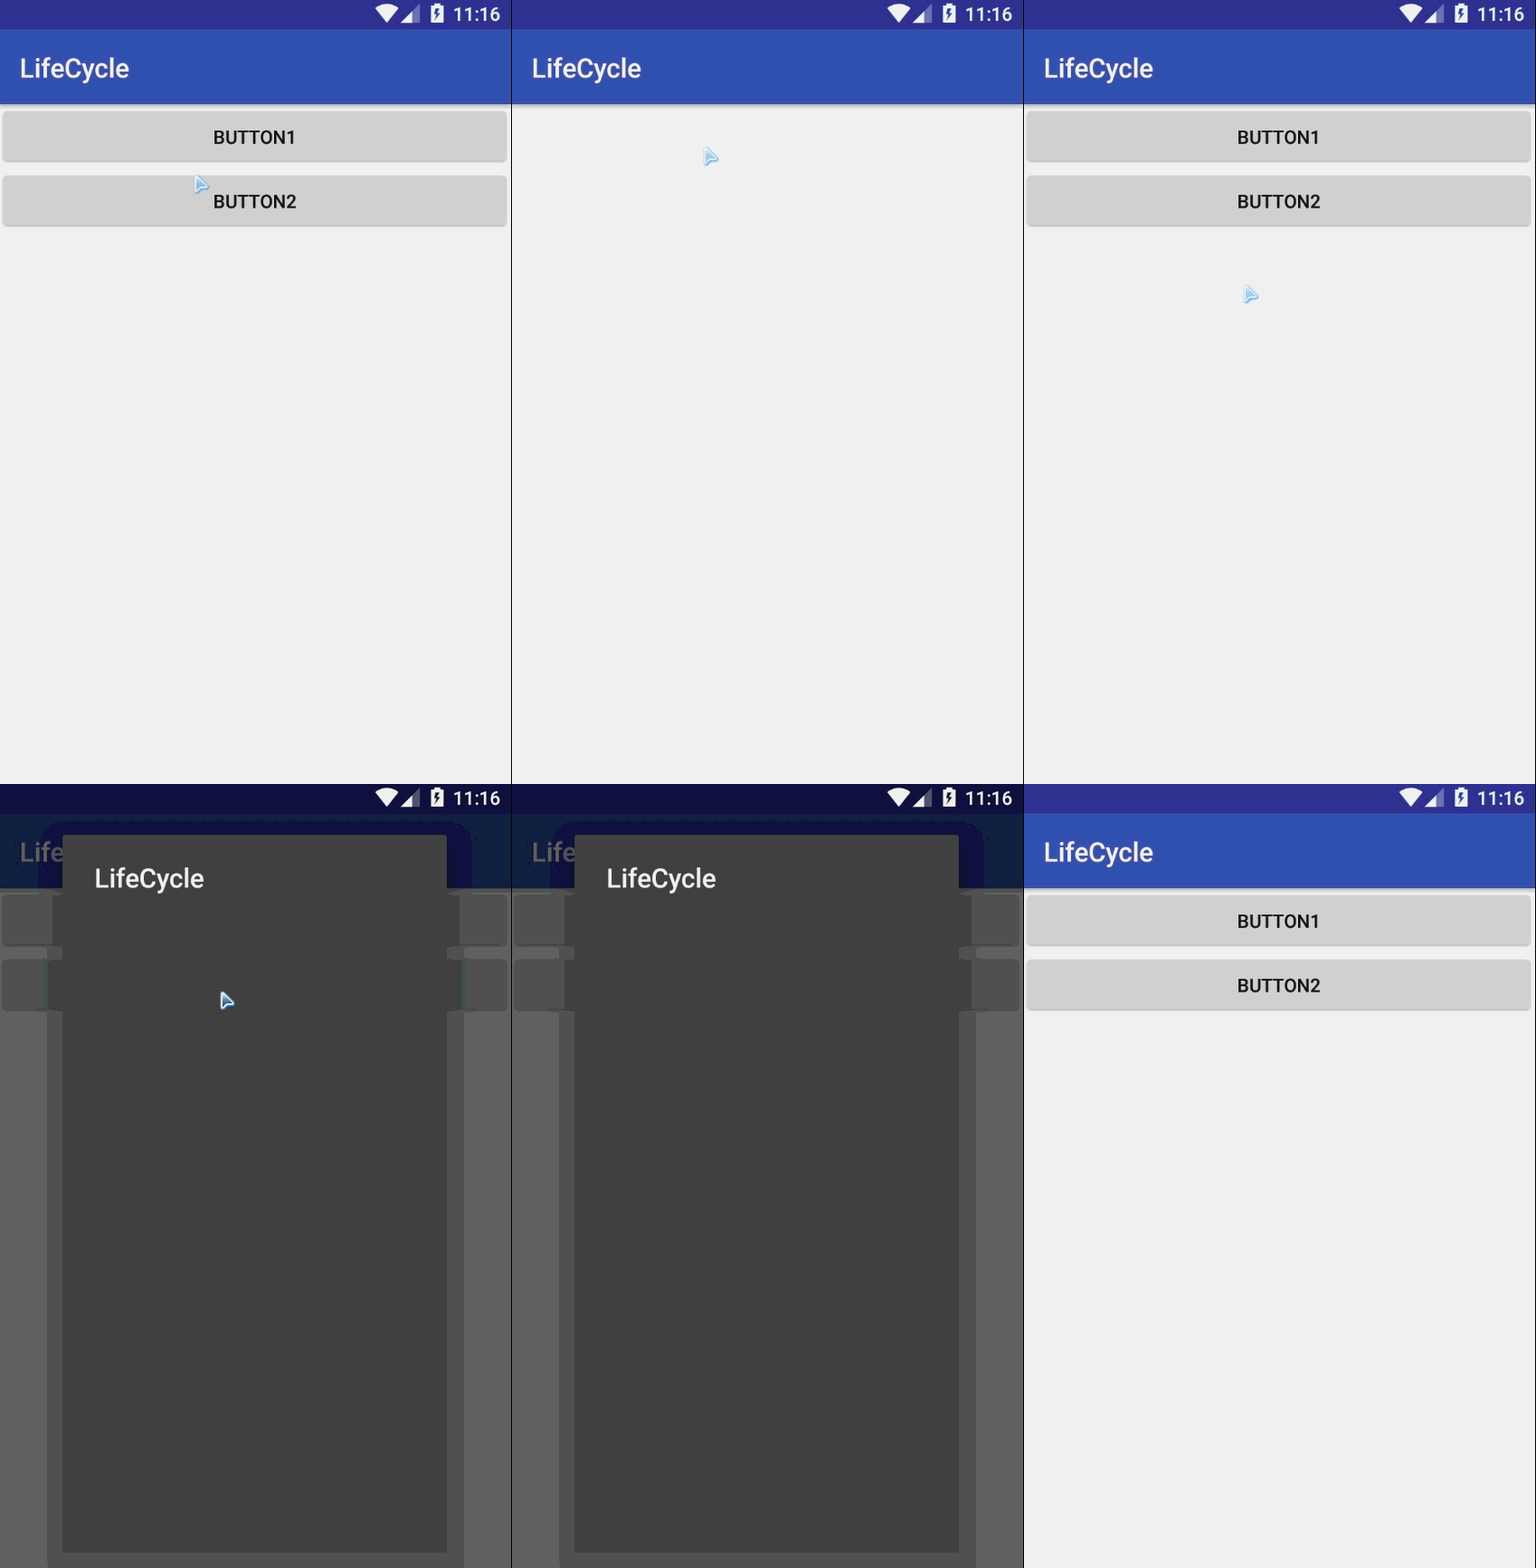
效果图:

|
|
 ( 粤ICP备18085999号-1 | 粤公网安备 44051102000585号)